Rip It All Down | Full Basement Reno Part 2
- Squeaking Dragon
- 1 day ago
- 4 min read
This is part 2 of my basement project posts. This post continues on from the last one, so if you haven’t read part 1↗, go check it out!
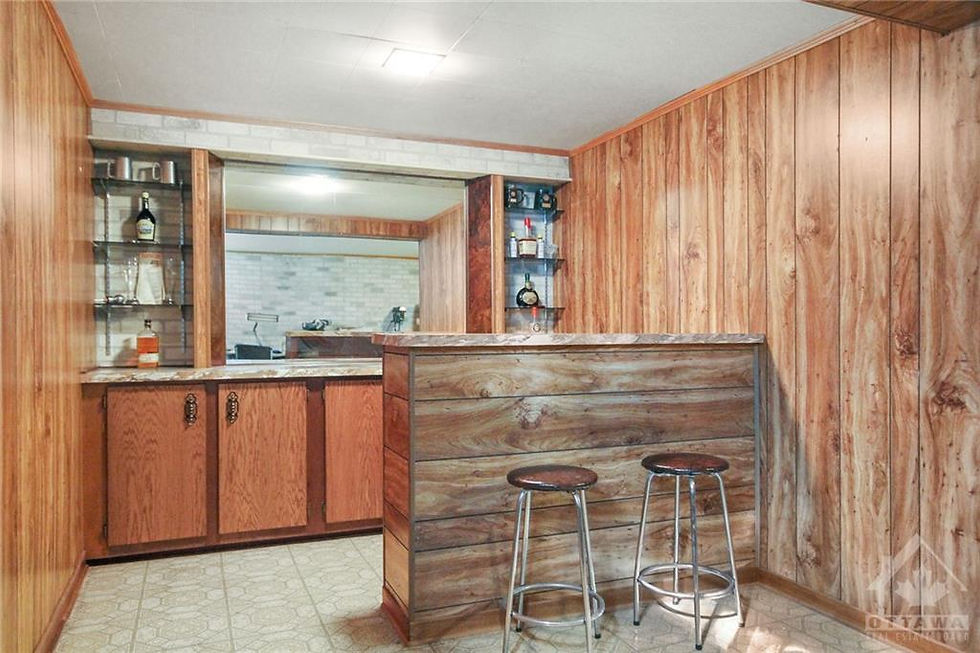
By the end of part 1 of the basement project, the bar and woodshop sections were gone.
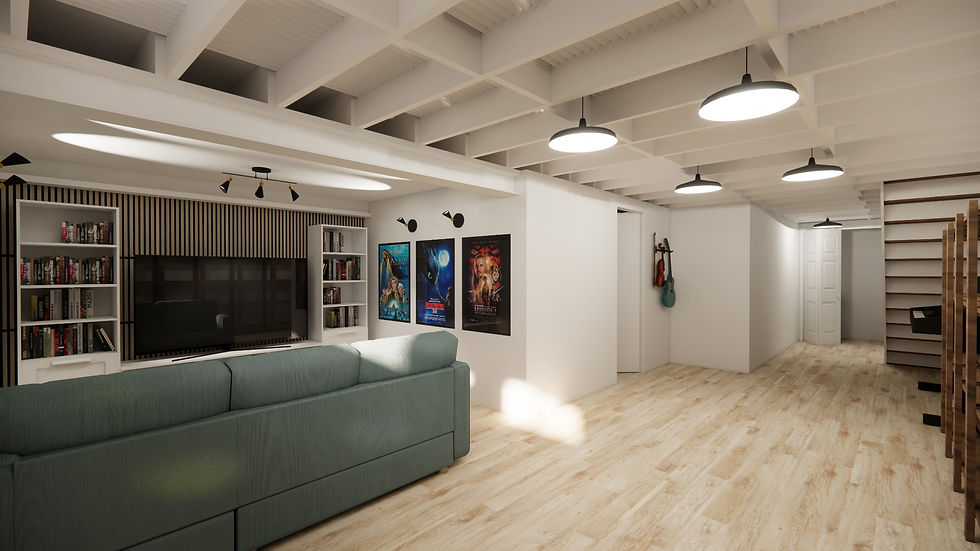
At this point, in early March 2025, we decided to keep going with the full renovation, and planned to get it done by the holiday season in December. After some discussions with my sister-in-law about what we wanted, she created a rendering of our design to get a better sense of the vision.


Was December a reasonable timeline? Was it ambitious? I think it was both, because, you could certainly get this basement done much sooner than December if you hired out a company to do it for you, but that would likely be quite expensive, and besides, my wife and I wanted to do most of the work ourselves. It’ll be challenging, but also fun and educational, and cheaper.
We were lucky enough that in mid-March, some family members were available to help. We blocked off the entire weekend to take down the ceiling, remove the wall paneling, and as a stretch goal, to move a wall.
Starting with the ceiling, no joke, it took 15 minutes. Total.
Then, we moved onto removing the wood paneling from the walls, and again, it only took about an hour.


Both these steps mainly involved grabbing a section and pulling it, and pop! Off it came. We were, of course, wearing gloves, masks, and goggles, as there was a lot of dust and small debris.
Luckily, we did not find any unpleasant surprises in the ceiling, but we did find a foam bowler hat! Who knows how long it’s been up there, and how it got there, but it was certainly a surprise to my father-in-law when it fell toward him after pulling down a part of the ceiling.
Another surprise was found, but this time from the walls. Turns out, the entire basement had already been drywalled, either when the house was built, or by a previous owner. The drywall was then covered by the wood paneling! So, as the paneling came down, we had near-perfect condition drywall on every wall. The only damage to them was the little we caused in actually removing the paneling, as it was attached using many nails.


Okay, good progress so far. We expected this to take most of the weekend, and much of this was done by the end of Friday night!
Let’s keep going!
Below the stairs going up the main floor, was a storage closet. Well, based on my use of the word “was”, you can probably tell where this is going.
We removed the closet.


What’s that? We still have time this weekend? Looks like we’ll reach our stretch goal of moving a wall!
But which wall?

If you recall in part 1, I mentioned that the old bar area was envisioned to be a movie space. Without doing anything else to this space, you could put a TV there and some seating, and you’d have a movie space.
In fact, prior to this demolition weekend, we had set it up to be a movie space.
It was… fine.
Eventually, we wanted a full sectional, rather than two recliners, which would require more space. Space that we did not have.
So, when the demolition weekend came in March, we were able to accomplish our goal of moving the right wall over by about 2.5 feet, giving us enough space for a sectional, and a proper walkway to reach said sectional.


This wall separates the movie space from the utility room. The utility room is quite spacious and would not miss the loss of the 2.5 feet. But the gain in the movie space was very exciting.

With the wall in its new position, and with the drywall re-attached, the change was pretty clear.
With that came the end of the weekend. We actually completed our goals faster than expected, which gave us time to have a nice visit with our family members as well. It wasn’t just a work weekend.
With the removal of the under-stair closet and the wall repositioning, the basement’s floorplan was set and ready for the next steps.
This brings us to the end of part 2 of the basement renovation project. I hope you enjoyed it, and thanks for reading!
Comments